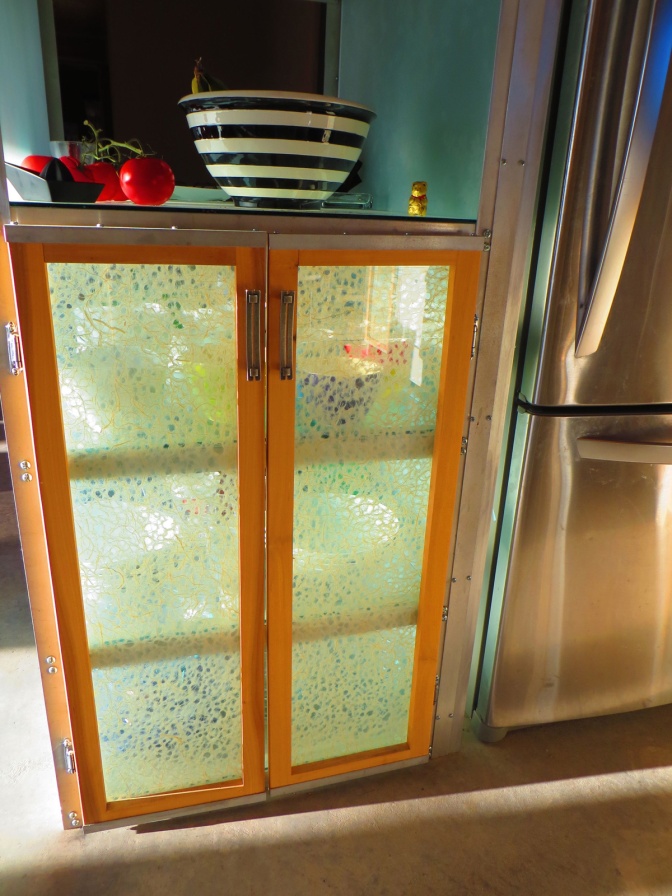
In Kitchen Cabinets, Part 2, I will explain how to build and attach the cabinet doors, join the cabinets together, and discuss countertop materials.
Joining The Cabinets Together
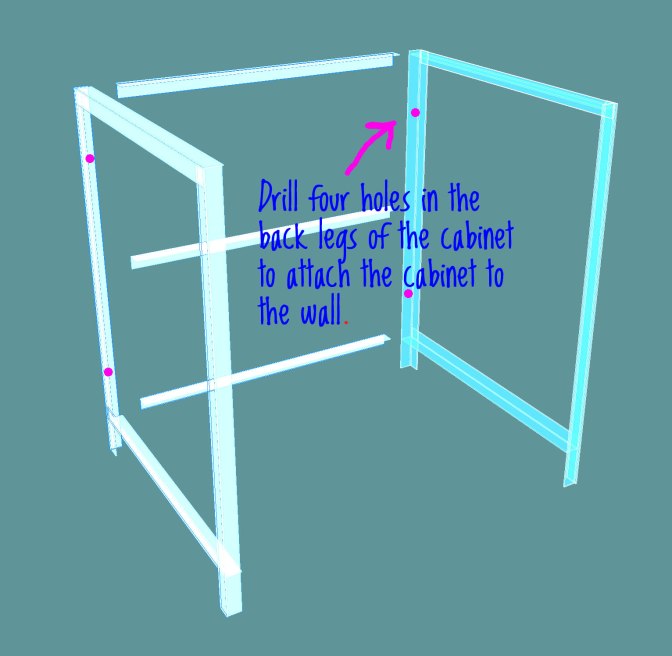
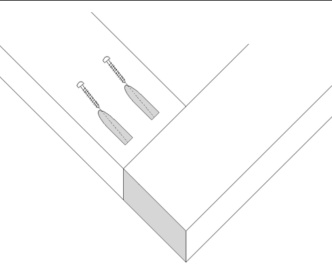
Before you install the glass shelves or install the doors, you will need to join the cabinets to each other and secure them to the wall. First drill four holes in the back legs of each cabinet (two per leg—shown as pink dots in the illustration below). You will use these holes to secure the cabinets to the wall after they are bolted together.
Next, clamp the aluminum angles together from the inside (front legs) and drill ¼” holes through both legs about 8” up from the bottom and 8” down from the top. Avoid areas where hinge bolts or shelf bolts will get in the way. Slide a ¼” x ¾” bolt through both legs, then a washer, then the nut. Tighten the nut and repeat with the other hole.
When all the cabinets are joined together, make sure they are positioned where you want them and screw them securely into the back wall using the holes that you pre-drilled in the back legs. Since we were drilling into pumice-crete, a contractor’s screw was used.

If you are drilling into wallboard, you may need to install an anchor first. To install the anchor you will have to move the cabinets far enough away from the wall to get it in and then move the cabinets back into position. I know that may sound obvious, but I am trying to give you a heads up on the order of events.
Building And Installing The Cabinet Doors
Begin by taking the four 10” wood pieces and drill out two pocket holes on each end (shown below in pink).
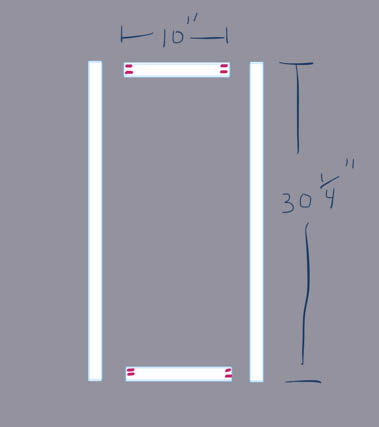
Next, clamp the 30-1/4″ sides to the 10″ pieces and screw them together with pocket hole screws. Sand the door frames. If you are finishing them, finish them now. Three safe finishes often recommended by chemically sensitive people are AFM Safecoat’s Polyureseal BP, Vermont Natural Coatings Poly Whey, and Vermeister Zero VOC Polyurethane. These finishes still need to air out, so build that time into your project timeline. (Two to three weeks is generally what it takes before I can move a sealed piece of furniture into the house safely.)
Take your 4 pieces of 13” aluminum angle and drill out 4 holes (two on each end, see photo below for locations).
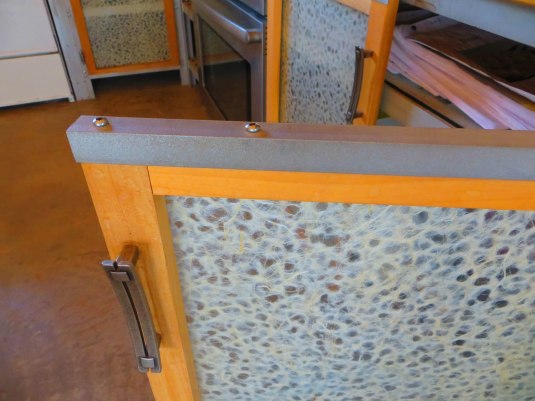
Clamp the aluminum angles to the top and bottom of the frame and drill pilot holes for the screws using a drill bit marked for use with metal. Drill pilot holes into the wood and screw in the pan head screws, securing the aluminum angles to the frame tightly. Repeat with the second frame.
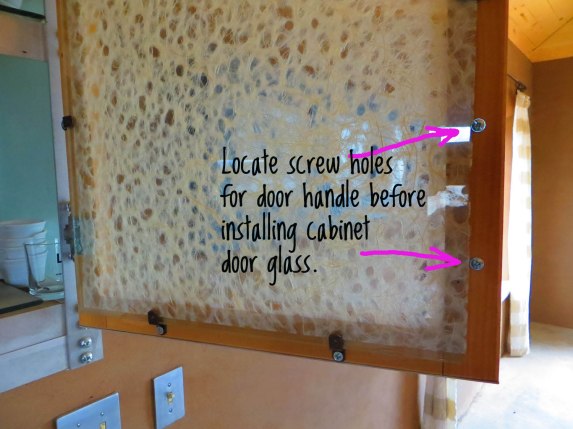
Decide where you want to place your door handles making sure the screws are next to, not under, the glass. Mark and drill out the holes for the screws, but do not install the handles yet.
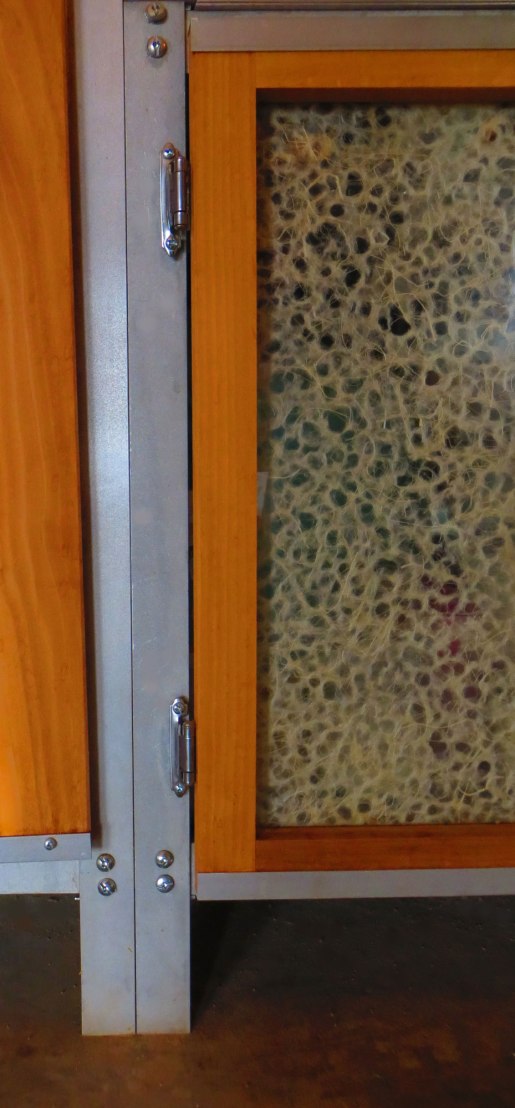
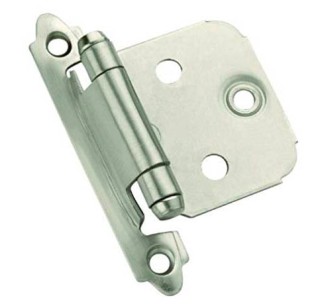
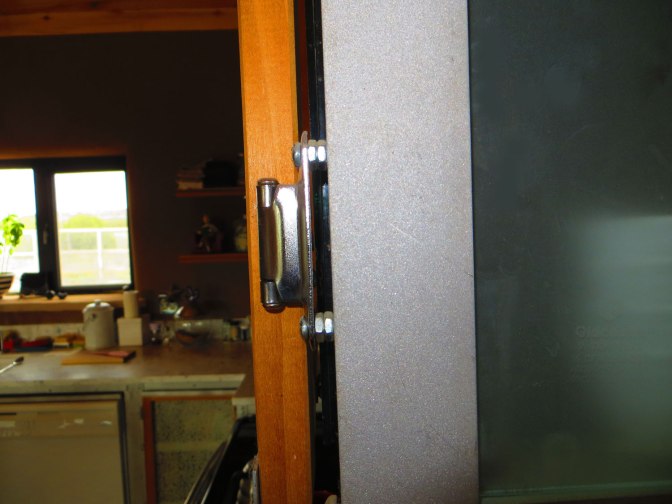
Next, install the hinges. I used self-closing face mount hinges (these hinges eliminate the need for magnet latches):
Because the wood doorframes are only 1-1/2” wide, the cabinet door glass will end up over the hinge. Ideally you would mark around each hinge with a sharp blade and chisel out this area to the exact depth of the hinge so that the hinge is flush with the wood. You can also remove the material with a router.

I did not do this, not because I didn’t know how or because I couldn’t be bothered. If I had been building my cabinets in a wood shop, I would have done it. But I had 26 cabinet doors to build outside, during a cold, snowy winter. The bank deadline for our building project was fast approaching and the weather was frequently not conducive to time-consuming hand carving or routering. So I installed the glass over the hinges and it worked out, the glass has not cracked and no one (except me) ever even notices. I mention all this because it makes the cabinet doors faster and easier to build. I’ll leave it up to you.
On the inside of the cabinet door, measure 5” up from the bottom and mark. Place the hinge so that the bottom of the hinge is at the mark.

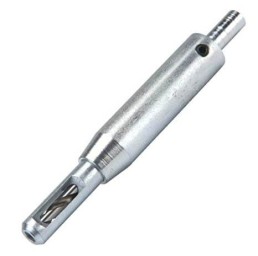
Drill out the pilot holes and screw the hinge into the wood. A regular drill bit is fine, but if you have a lot of hinges to install, a self-centering drill bit is a time-saver and worthwhile investment:
Measure 5” down from the top of the door and mark. Place the hinge so that the top of the hinge is aligned with the mark. Install the hinge in the same way you installed the first one.
Normally cabinet door glass is installed in a recessed rabbet (a step shaped recess cut along the edge of the wood) so that the glass is inset, flush with the wood. My outdoor woodshop and time constraints required I build the frames without this step as well. If you plan to cut rabbets, you should reduce the size of your glass so that there is only a ¼” overhang on all sides instead of a ½”.
I sandwiched a piece of Japanese lace paper between two pieces of 1/8” heat tempered glass. Art stores have a large assortment of beautiful papers, if lace paper is not what you are looking for. You could also install photographs or drawings or fabric. Or you can install just one piece of clear or sandblasted glass.
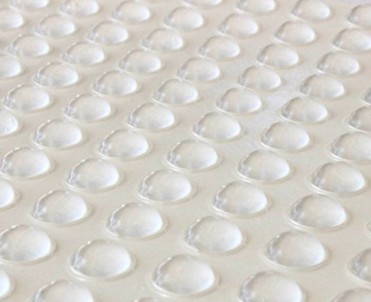
With the inside of the cabinet door face up, lay the first piece of glass centered over the opening and make sure it is not over the door handle screw holes. I put a small silicone bumper under each corner of the glass between the wood and glass. These did not seem to smell and I did not have any bad reactions to them, but you can leave this step out if you are nervous about them. Without the bumpers, be extra careful not to over-tighten the glass retainer hardware when installing.
If you are sandwiching paper between 2 pieces of glass, lay the paper over the glass. Carefully place the second piece of glass on top of the paper. You may have to fiddle around with the paper a bit if it moves during this operation. Since I was working outside, I actually had a few Buster Keaton moments where a gust of wind blew my paper away, requiring me to chase it through the desert. Hopefully you will have better working conditions.
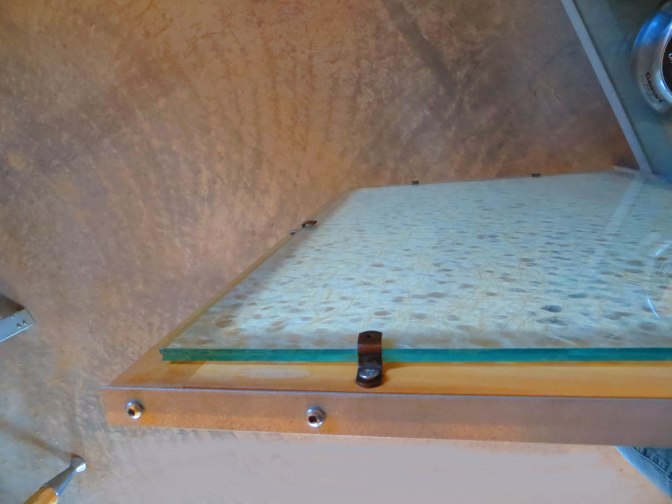
Install your glass retainer hardware on all four sides being careful not to over-tighten. Install the door handle. You are now ready to attach the cabinet door to the cabinet. It is very helpful to have a helper hold the door in position so you can mark where to drill your holes into the cabinet. If you did not install the glass in a recessed rabbet (as I already admitted, I did not—fellow woodworkers do not judge me) you will need to use two nuts as spacers between the hinge and cabinet:
Have your helper hold the cabinet in position with the bolts going through the holes you drilled. On the inside of the cabinet, place a washer or lock washer on the bolt and then screw on the nut and tighten. Repeat with the rest of the bolts. Install the other door making sure to leave an 1/8” gap between them so the doors open and close without hitting each other.
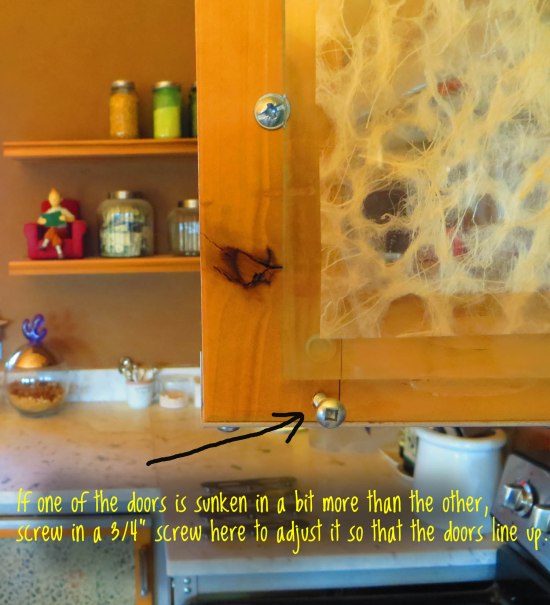
If one door is sunken in a bit—in other words closing so that the edge is in more than the other door—screw in a ¾” screw at the lower corner. Adjust the screw up or down until the doors are in line with each other.
Countertop Materials
One thing I learned when we were researching countertop options is that natural stones can have voids that are filled with epoxy resins that match the stone. Once the stone is polished, it is very difficult to see the epoxy, even if the surface is riddled with it. Travertine is especially known to have these voids. (Thank you to the stone shop sales people who were honest about this.)
We were considering using ¼” (or 3/8”) heat tempered glass as our countertops since the glass I was working with for the cabinets was so safe. It was not off-gassing anything, would not need to be sealed, would not mold no matter how much water was on it, and would be easy to clean with lemon juice or white vinegar. My plan was to have the glass place drill 1/8” holes 1” in from the back edge of the glass. This would allow me to attach the glass to the back top rails of the cabinets with 1/8” x 1” bolts. Before I moved forward on this plan, I spoke to another stone company in Santa Fe.
David at Captain Marble (great name!) in Santa Fe said he had some Carrera marble that was in our budget (in part because we saved a lot on labor costs on the kitchen since I built the cabinets myself). Apparently, Carrera marble has a very tight grain and so does not have epoxy fillers. I said that I did not want any sealers on it and David said, “If you’ve ever been to an old European farmhouse, you’ll see beautiful, worn, stained marble. They never used to seal marble back in the day, they just lived with the stains!” I immediately pictured a charming Italian farmhouse kitchen with a century’s worth of red wine stains on the white marble counters and said, “Great, let’s do it!”
Another stone countertop company I talked to insisted that stone countertops had to be attached to the cabinets with adhesive. I know there are safer adhesives, but I really wanted no adhesives. When I asked David about this he said stone is very heavy and would not move and did not need adhesive, even unanchored by walls like on the center island. And he’s right, I can lean my full weight against any counter in our kitchen and the stone does not move.
If you can’t do stone countertops, I stand by my heat-tempered glass countertop idea for a healthy house. It is very inert and if it is durable enough for tabletops, I think it could withstand the demands the average cook would place on it.
Good luck with your cabinets, please send pictures if you make them!

Margaret, your blogs are superb. I hope you turn them into a book. It would be so very helpful for many people who need to have not only a beautiful house, but one that is non toxic. Love, Erica
LikeLiked by 1 person
Thank you Erica!
LikeLike
HI Margaret,
Thanks so much for your detailed tips. I was wondering if I could summarise this in an article for our support group magazine for the spring? http://www.mcs-aware.org
Nicki info@mcs-aware.org
LikeLike