Because kitchen cabinetry is normally made from engineered materials like mdf, plywood, or particleboard, people with chemical sensitivities have to find other solutions that will be safe for them. Some people have their cabinets crafted out of solid wood and seal the wood with a safe sealer like AFM Safeseal or other product that they tolerate. Others find all metal cabinetry.
My original plan was to build my cabinets out of poplar then finish them with milk paint and a safe sealer. Unfortunately, my husband and I were camping on our land while the house was being built so I had no wood shop. While lying under the stars one night thinking/obsessing over the problem of how I was going to accomplish this project outside, I kept coming back to the same issue: how was I going to keep the wood from molding? One of our ongoing struggles living outside was how to keep things dry. Building a whole kitchen would likely take months, so the finished cabinets would be vulnerable to all kinds of weather while the rest of the cabinets were being built. The solution I came up with was to use aluminum angles, sometimes called L’s, and heat-tempered glass for the sides and shelves—materials that are very inert and would not off-gas anything into the house. These cabinets are much safer than my original AFM Safesealed poplar design.
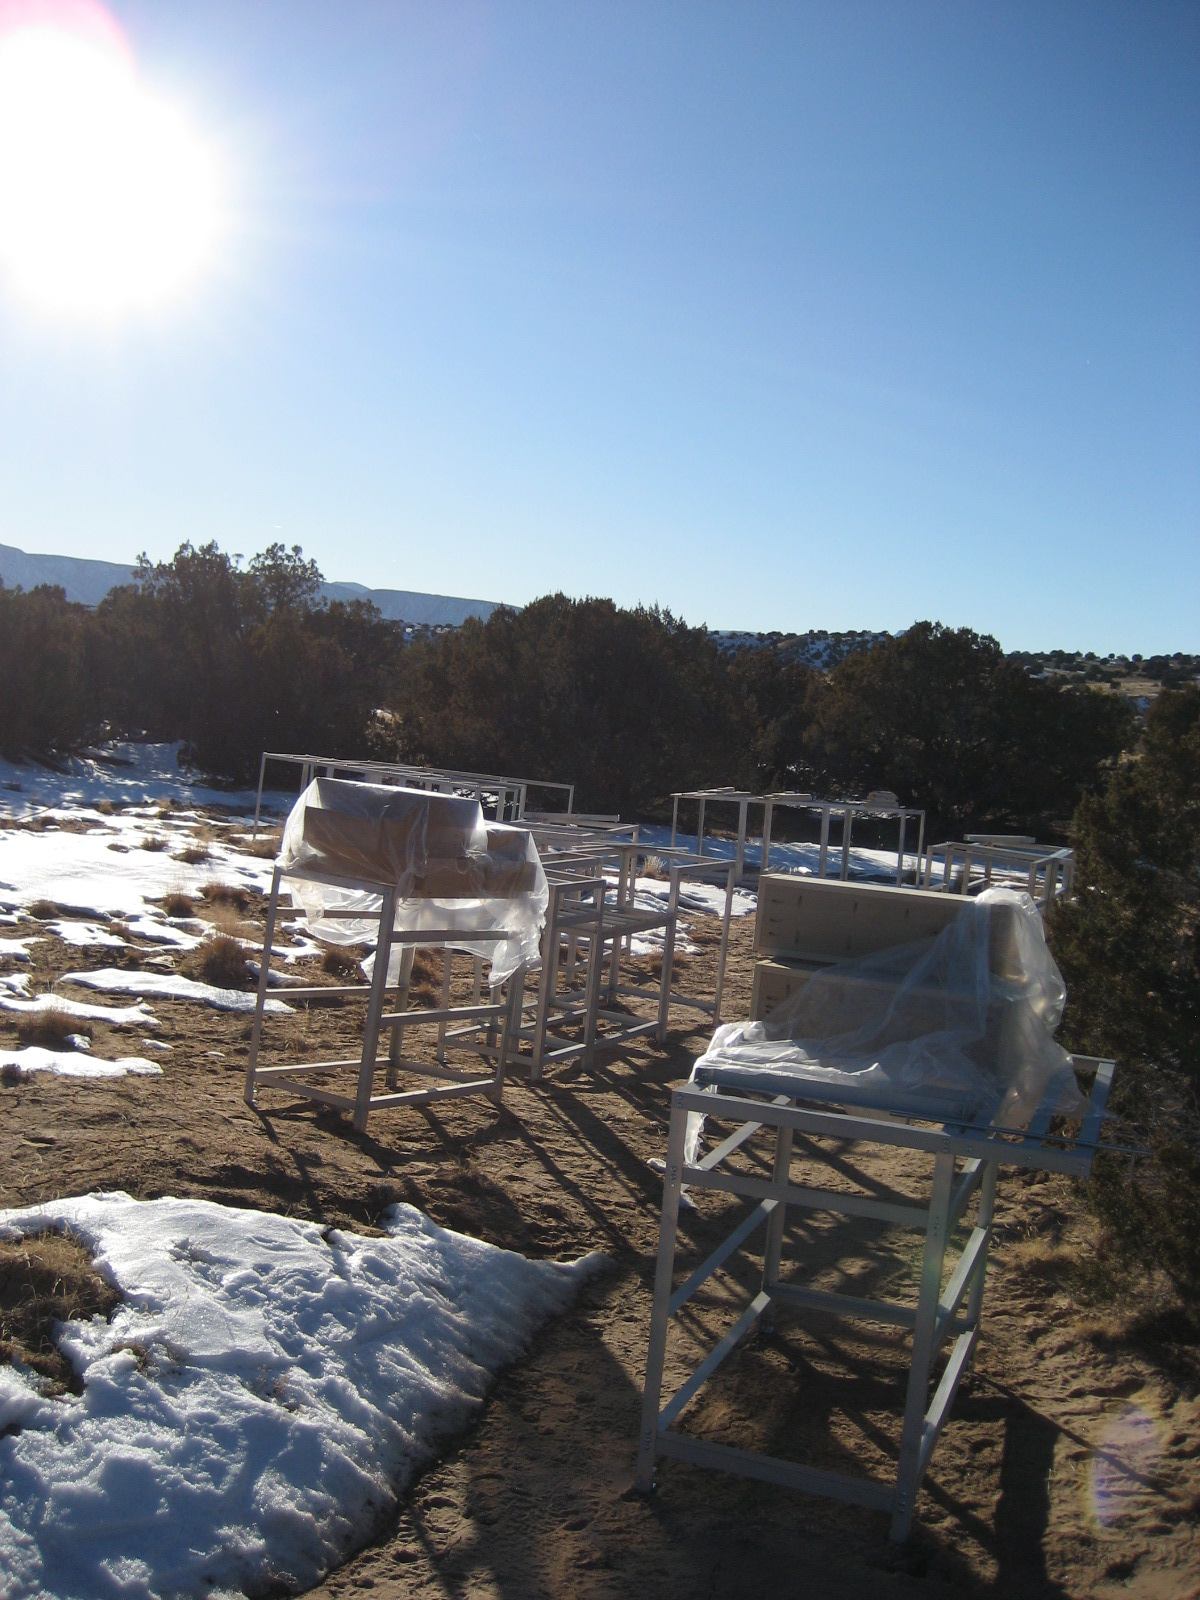
Here is a picture of the cabinets being built in my snowy outdoor workshop:
The following are instructions on how to build an aluminum and glass cabinet 26-3/4”D x 36”H x 29”W. You or a cabinetmaker or handy person you know can change the dimensions for the cabinet to suit your space using this project as a model. A kitchen requires many different sizes of cabinets, including upper cabinets, and this basic design (aluminum frames with glass panels and shelves) can be used to build all of them.
The aluminum angle I used was 1/8” x 1-1/2” x 96” long. I don’t want to give the store we purchased them from free advertising, but it’s name rhymes with Lowe’s.
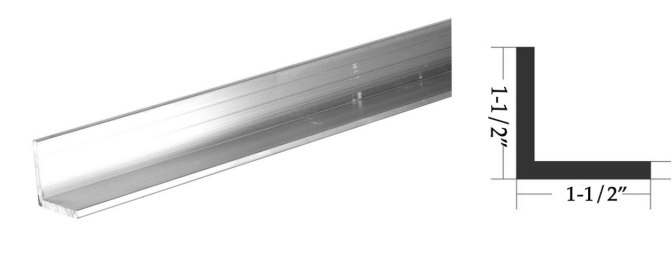
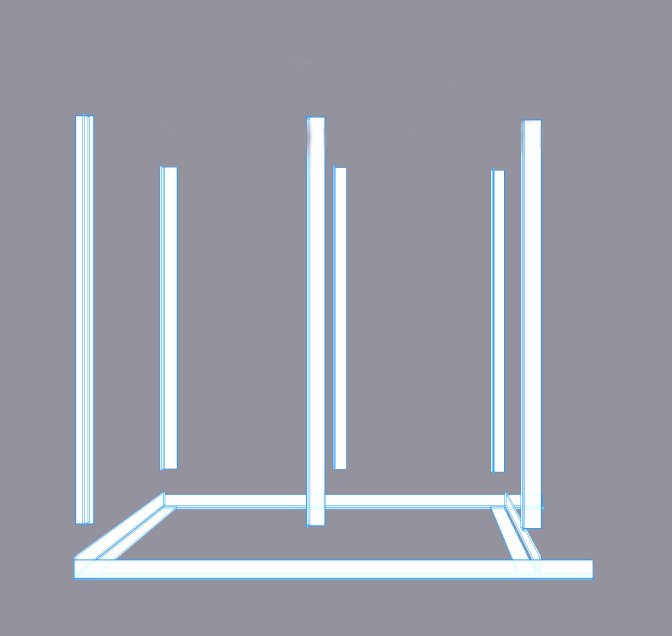
The aluminum angles cut easily with a power miter saw, though if you have a wood blade installed, change it out for a blade suitable for metal. Here is an overview picture of the frame:
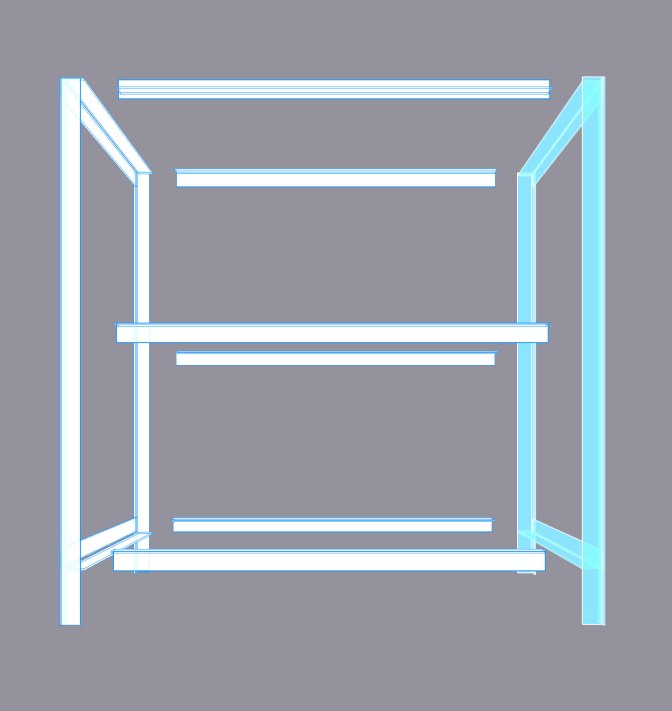
I did not put glass panels in the backs of cabinets unless the back would be visible. (In other words, if the back was against the wall, that cabinet has no glass back.) Since tempered glass is expensive, you can also skip the glass in the sides in those cabinets where the side is against a wall or another cabinet. If it is free standing, like the center island, you will need glass in the sides and the back if you want it enclosed. Not shown in the above picture are extra braces that attach to the top of the frame and help to support the counter top material. I’ll cover that at the end.

We will build the two sides first and then join them together with the front and back shelf support pieces.
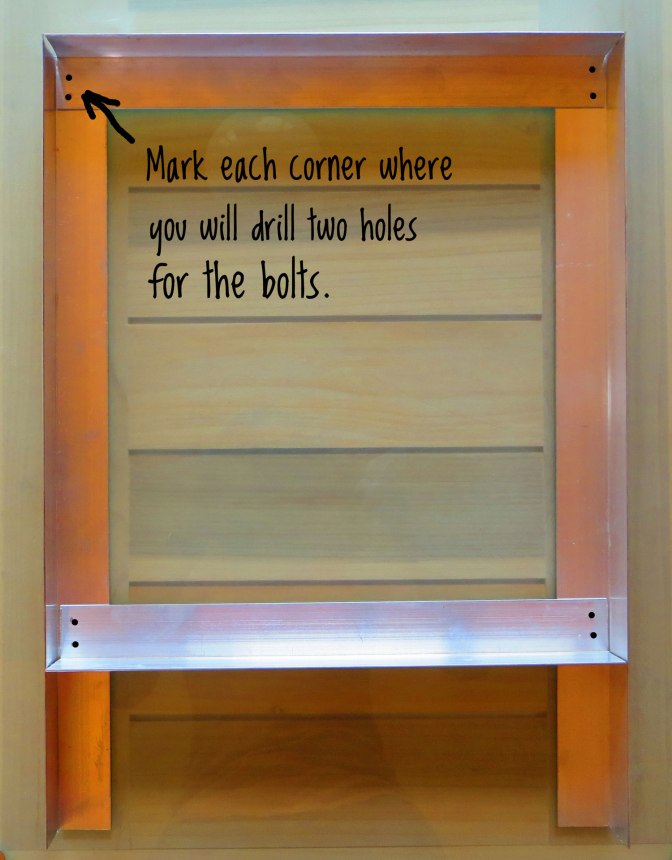
The above photo is a mock-up I made out of some scrap pieces and is not to scale. Take two of the 35-1/4” Leg pieces and 2 of the 26-1/2” side pieces and lay them out like the picture above. Mark the bolt holes as pictured. Mark each leg piece 4” up from the bottom and align the bottom edge of the horizontal side piece with those marks and clamp on. Don’t clamp over your bolt hole marks, you will be drilling out the holes with the clamps in place. Clamp the top horizontal side piece to the top of the leg pieces. Clamps you can manipulate with one hand are more convenient for this project.

I tend to prefer the “Quick-Grip” style clamps because sometimes you need to be bionic to open certain brands of metal spring clamps and it adds an extra hassle factor to your workday. Place a scrap piece of wood under the hole you are drilling and use a ¼” drill bit designated for metal to drill through both pieces. (If you have a drill press, the hole drilling is faster but not necessary.) Repeat this for the rest of the holes and then begin bolting the pieces together. Slide the bolt through the hole from the outside, place a washer or lock washer on the inside, and then screw on the nut and tighten.

When choosing bolts, consider how the bolt head will look on the cabinets. I decided on a pan head bolt which you can get from McFeelys Square Drive Screws.
Assemble the other side piece.
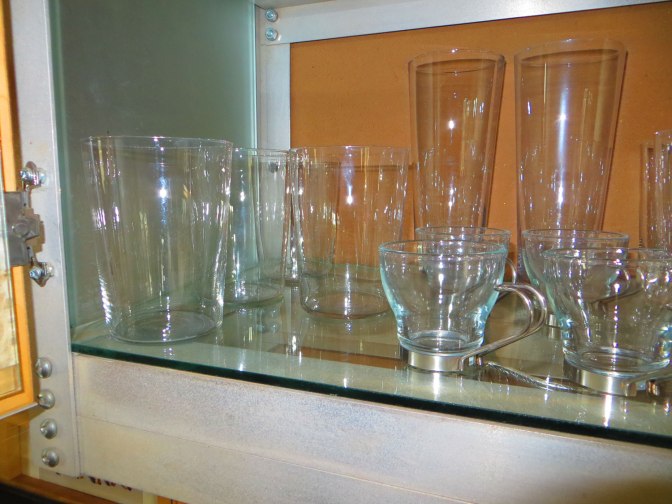
The tempered glass shelves sit on the aluminum angles like this:
When your are attaching the front and back shelf supports to the sides, make sure to orient them as an upside down “L” (the below view is of the side of the cabinet):
In those cabinets that have ¼”glass in the sides, you need to leave space for the glass when drilling out the holes to attach the front and back shelf supports.
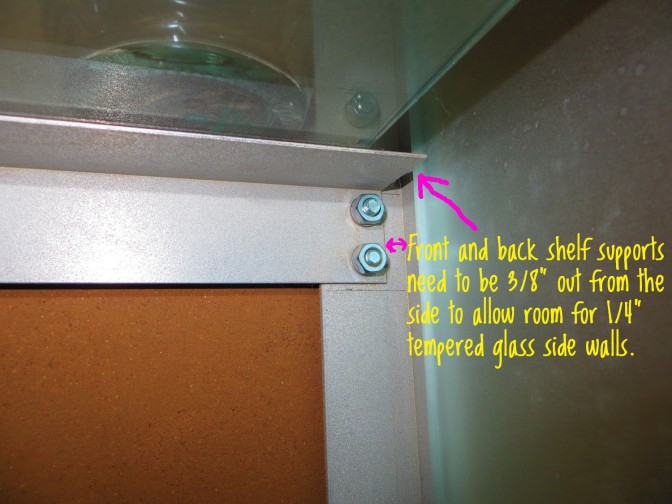
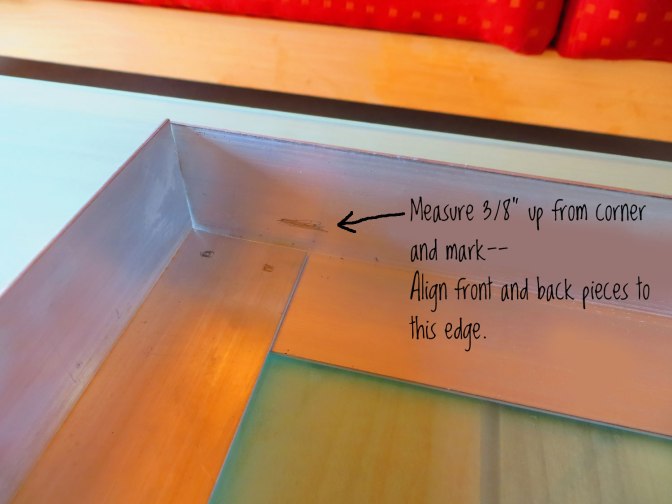
With both assembled side pieces lying flat, measure 3/8” up from the horizontal top and bottom pieces and mark. The bottom edge of the middle shelf is 19-1/2” up from the bottom of each leg. Mark this position on all the legs, then measure 3/8” from this shelf location and mark so you leave space for the glass here as well.
You are now ready to join the two sides together. Lay one of the sides flat and clamp the front and back shelf supports to the frame, making sure they are clamped tight enough that they will not slip down into the space you are leaving for the glass. Mark two holes and drill them out on all the pieces like you did with the sides.
If you are putting glass in the sides, you need to install the glass before you can bolt the front and back shelf supports on.
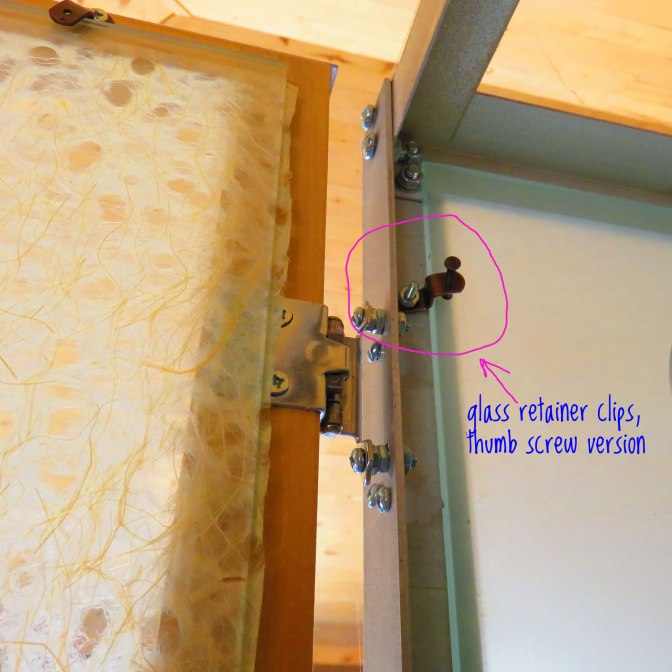
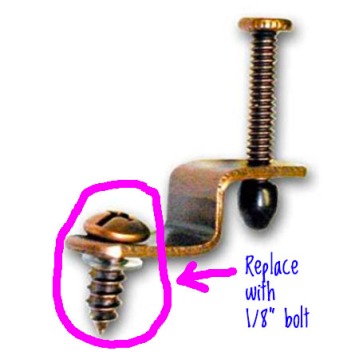
You will have to replace the wood screw on the glass retainer hardware with an 1/8” x ¾” bolt. Lay the glass inside the cabinet side making sure the bottom is resting on the bottom rail. Using the glass retainer hardware as your guide, mark two holes per side a couple inches from each corner (see inside of the cabinet photo above). Remove the glass and drill out the 1/8” holes using an 1/8” drill bit labeled for use with metal. Place the glass inside the side and attach the glass retainer hardware with the 1/8” nuts and bolts. Using the thumbscrew, tighten until the glass is secure but the thumbscrew is not too tight against the glass.
Lay that side flat (with inside facing up) and bolt all the front and back shelf supports to that side.
Lay the other side on top of the shelf supports (do not install the glass on this side yet), clamp in place, and drill out the bolt holes. Remove the side, install the glass as you did with the first side, place it back into position, and bolt into place.
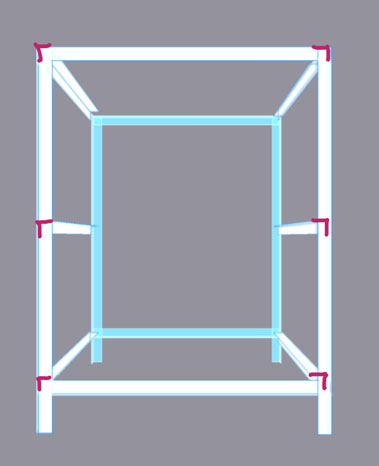
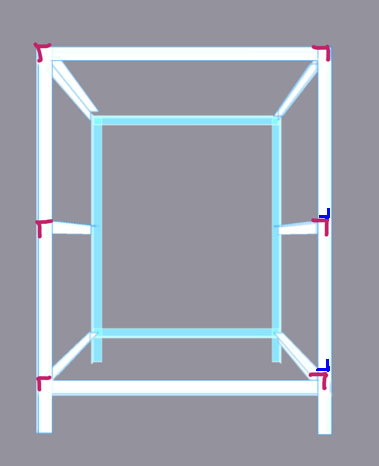
If you are also installing glass in the back of the cabinet, you will need to attach the two ¾” x 28” pieces on top of the back bottom and back middle shelf support pieces, location and orientation marked below in blue:
Here is how that looks from the back of a finished cabinet:
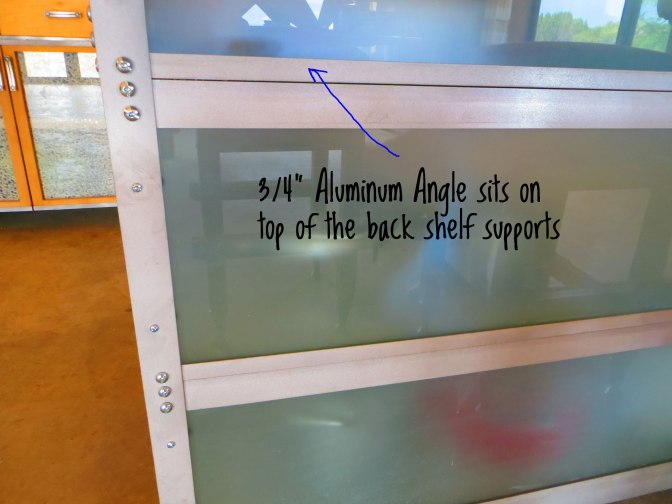
As you can see, it is bolted onto the legs immediately above the shelf support bolts. Install both pieces, then install the glass the same way you installed the side glass.
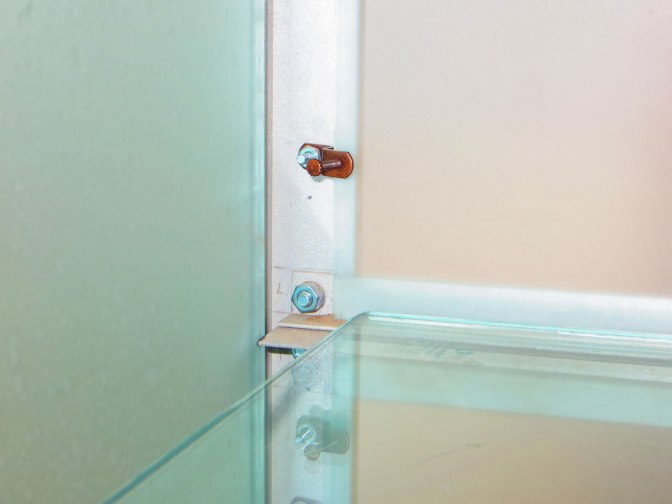
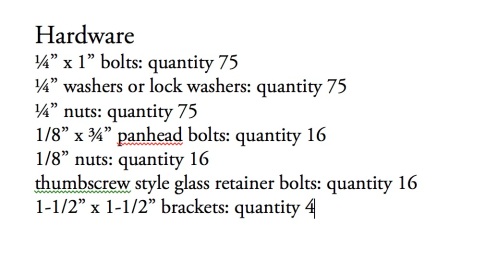
Inside view of a cabinet with side glass and back glass—note brown glass retainer hardware securing the back glass. Next you need to install 2 cross braces in the top of the cabinet. Take your two remaining pieces of 1/8” x 1-1/2” x 28” aluminum angle and four 1-1/2” angle brackets.
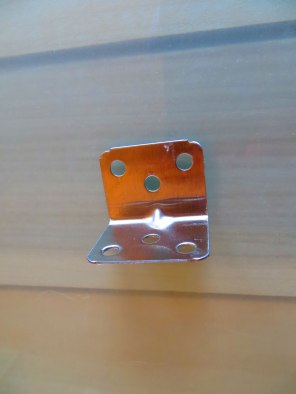
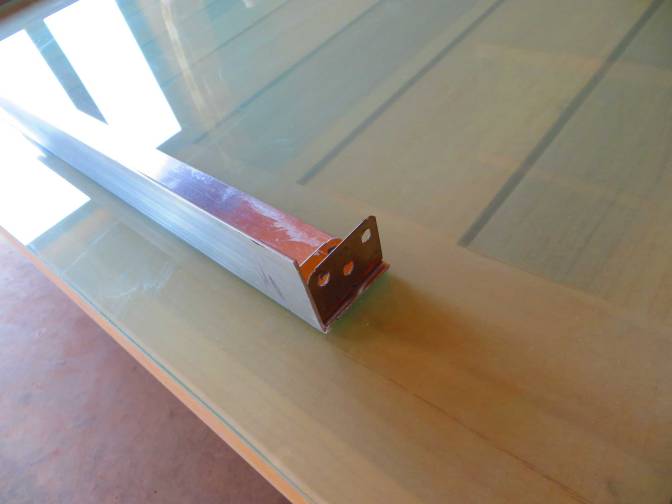
Align the brackets to the outside edges of the aluminum angles, clamp, and drill holes through the aluminum angles using the pre-drilled holes as your guide. I only drilled the two outer holes.

Facing the front of the cabinet, measure 9” in from the left side and make a mark on the top front piece. Now measure 9” from the right side of the top front piece and make a mark. Repeat these measurements on the top back piece. The braces are installed front to back, aligned with these marks. I only used the center hole on the brackets to install them because it is a cleaner look and seemed plenty strong. Clamp the brace to the inside of the front and back of the cabinet, drill out the aluminum using the center hole on the bracket as your guide, and bolt securely to the cabinet.
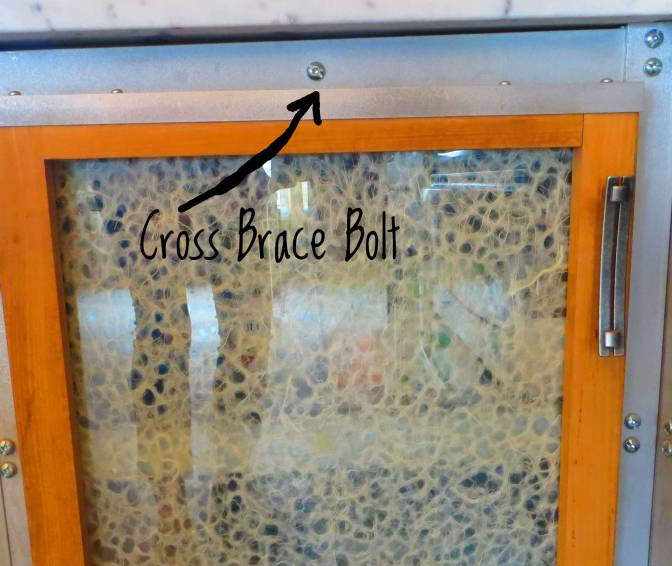
The cross braces add extra support for whatever countertop material you are using.
Aluminum is lightweight but once you add the glass shelves the cabinets are quite heavy. For this reason, it is a good idea to move your cabinet into position before sliding in the glass shelves.
In Kitchen Cabinets, Part Two I will explain how to build and attach the cabinet doors, join the cabinets together, and discuss countertop materials.

Reblogged this on Seriously "Sensitive" to Pollution and commented:
If you need safe (non-toxic) kitchen or other cabinets, here’s a brilliant idea with the basic how-to from Margaret Forrest at her new blog Build A Healthy House.
LikeLike
Thanks for reblogging this!
LikeLike
Margaret, you are truly amazing. I’m in awe of your beautiful and practical creations. Since I don’t possess those kinds of skills, you appear to be a building genius to me.
LikeLike
Thank you Erica!
LikeLike
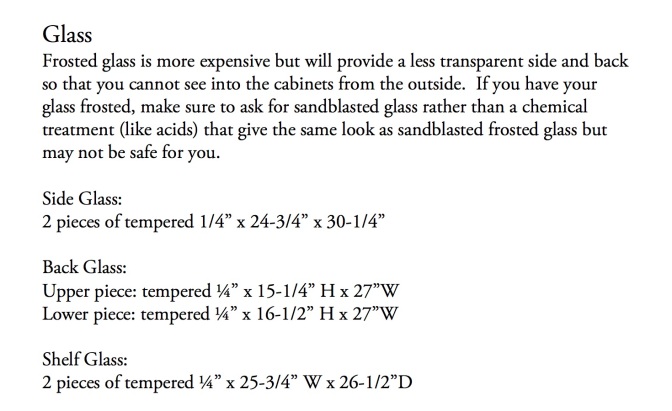
Did you use heat tempered rather than chem tempered glass, and if so, where did you find it? If it’s chem tempered, did you have trouble with it? I had some trouble after trying to clean new chem tempered glass with vinegar to remove packaging bits, stunk badly for a while. Not sure if chem tempered could be used successfully for dish or towel cabinets.
LikeLike
We used heat-tempered. Santa Fe Glass and Mirror and The Glass Doctor are two places we used in Santa Fe and they both offered heat tempered. Thanks for making this point, I should have said that in the post.
LikeLike
Beautiful ! You are amazing !
LikeLike
Thank you, Dorothea!
LikeLike
Hello, what kind of wood did you use?
Can you recommend an odor free wood?
Thank you!
LikeLike
Ooops, now I see that you answered that in part 2. 🙂 Thank you!
LikeLike
Poplar works for me. I would air it out a bit before testing in case it picked up smells from other lumber. Good luck!
LikeLike